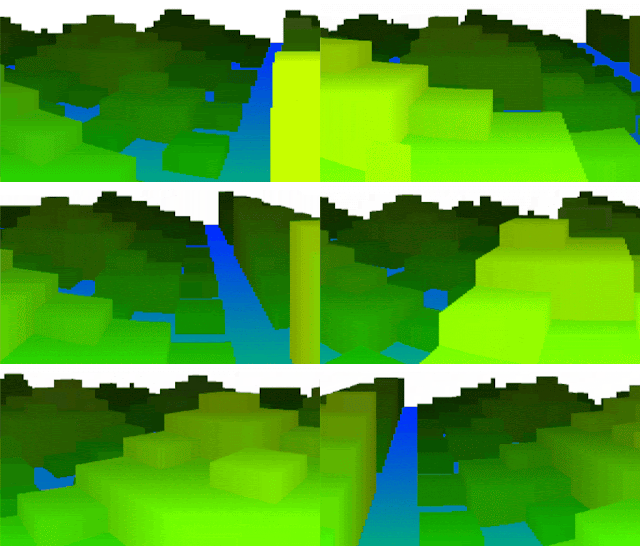
The idea for this very short demo came from trying to fit my old JS1k demo "3D City Tour" floorcasting engine into 140 bytes. While working on it I thought it would be cool to try and mimic Minecraft landscapes. Our family's youngest daughter Tuulia is a big fan of the game which not only gave me inspiration for the challenge but also meant that I had a boss who wouldn't settle for anything less than the original. Eventually I told her she would have to live without the lambs.
1. Floorcasting engine
Well, you first do it in 100 bytes and then just have fun with all the remaining space. :)
Here is the source code for the 100 byte version which I'll use to explain how the landscape generation and rendering work...
for(c.width=i=W=99;i--;)for(j=W;j--;)x.fillRect(i,j,2/(d=700/j),~(d*S(A=i/W+S(t))&d*C(A)+t*9&5)*W/d)
It really is that short. We are using a nested loop. First loop goes through each column of the screen (variable i is basically screen x-coordinate) and the second goes through each row (variable j is screen y).
In the heart of the loop is a call to HTML5 canvas fillRect method. It takes four parameters - x, y, width, height. This is all we need for rendering. The loop goes through each pixel on the screen and we need to decide on two things - the height and the opacity of the rect to draw at that position. The default color is black so we don't need to set it and we can fake greyscale by using rects that are less than 1 in width. You can think of the width as the alpha channel.
I've explained the process of floorcasting in the past so I won't go into detail about it here. In this demo we aren't really doing anything differently, we just do things super efficiently. I'll break it down next.
2. Variables
Variable A is current ray angle. It is calculated by dividing the screen x by total width and adding the camera direction (yaw). Camera direction could be anything but we use the sine of elapsed time for smooth and exciting movement. We could save three bytes here by settling for less pleasing camera path.
A = i / W + S(t)
Variable d is a distant factor. We will need it to figure out where our current ray lands in the world coordinates. We also use it for the fog effect. It is calculated by defining a large number that we divide by the current screen y. 700 was selected because Toni Kukoc wore number 7. For different landscapes another number could work better. We are just doing scaling here.
For our world coordinates we use basic trigonometry. Below are the lines that calculate world X and world Y. We add elapsed time to Y coordinate to achieve movement. It's multiplied by nine cause we like it fast and we have the bytes for it.
X = d * S(A); // world X
Y = d * C(A) + t * 9; // world Y
Since we are in code-golfing mode things can be a little tricky to spot from the source code. The landscape is the result of a very simple height function using the bitwise AND operator. 5 creates a lego city landscape while 7 gives a mountain terrain as used in the color version of the demo.
h = (X & Y & 5) * 300 / d; // world X & world Y & 5
We multiply the output of this formula to get more height and then scale it with d for perspective correction.
That's really all there is to this massive rendering engine.
3. Adding colors
For the colored version we need to set RGB channels with fillStyle. Dwitter has a handy R(r,g,b,a) function for this purpose. For the red channel we use the height function value which is h. This makes the high areas more yellowish. For the green channel we use the screen y which in the code is variable j. This channel dominates the scene. It makes distant areas darker adding a nice feel of depth. We use the bitwise OR operator to add fake texture that costs us 2 bytes. Last but not least is the blue channel. This brings the scene alive and is perhaps the most clever part of the demo. First we check if height (h) is false (0). If it is not then zero is returned as value and things stay green. If h is indeed false we need to make the pixel blue. W is set to 300 earlier and we subtract the screen y from it. This means that the pixels higher up the screen will appear more blue than the ones near the bottom. It makes the visuals more interesting than using screen y by itself but also costs two more bytes.
Red = h, Green = j | 2, Blue = !h && W - j;
The rest of the bytes go into optimization and refining the camera path. The colored version doesn't use opacity so the drawing has to be done with painter's algorithm. It's trivial to just loop screen Y from top to bottom but takes more bytes than the other way around.
4. Conclusion
While it looks like a lot for 140 bytes it really is quite simple demo. And simplicity of course is the key to creating things with limited bytes. Some of my other Dwitter demos have more complex code in them. I'll keep posting more and writing about them. Here are all the demos I've released so far: www.dwitter.net/u/jylikangas
Special thanks to Mathieu 'p01' Henri for saving me 3 bytes with the 100 byte version!


Ei kommentteja:
Lähetä kommentti